From UEFI Boot to Dual-Boot Systems
A Journey of Migrating Linux Partitions in a Dual-Boot Setup
This article explains the working principles of UEFI and provides a step-by-step guide for resolving insufficient space issues in a dual-boot (Windows and Ubuntu) environment. The process involves resizing partitions, migrating data, expanding Linux partitions, and repairing Grub boot configurations. It highlights the boot failure caused by partition relocation under UEFI and offers solutions such as manually booting the system via command line, updating Grub configurations, and ultimately restoring normal dual-boot functionality.
Subsribe for more!
Preface
I have a dual-boot setup (Windows and Linux) on my desktop computer.
I own two 1 TB hard drives, which I’ll refer to as Disk 0 and Disk 1. Initially, Windows was installed on Disk 0, while my data partition was on Disk 1.
Later, I wanted to try Ubuntu, so I resized the Data partition on Disk 1 using the installer and installed the system there.
Everything worked fine until one day Ubuntu warned me about running out of space.
After some careful consideration, I decided to proceed as follows:
Free up space on the Windows disk.
Resize the Windows partition to 500 GB.
Clean up data on Disk 1.
Copy the Data partition to the free space on Disk 0.
Expand the Ubuntu system partition on Disk 1.
Adjust the boot configuration to ensure the system starts correctly.
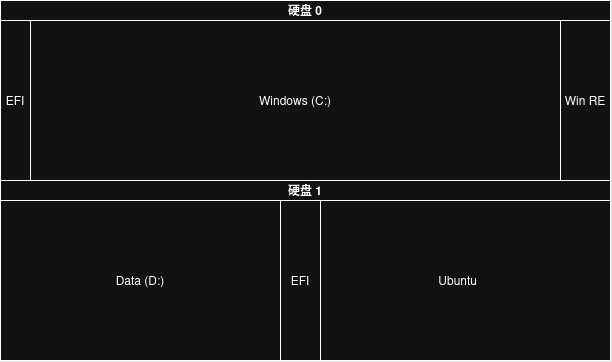
Without further ado, let’s first look at the initial partition layout.
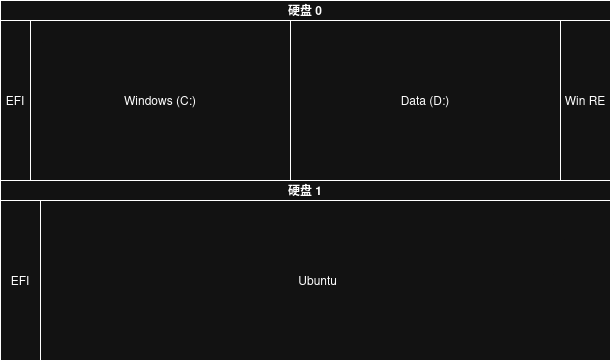
And here’s the target layout we aim to achieve:
During the migration, the most time-consuming part wasn’t copying data but configuring the boot process.
So, this article will start with how a computer boots, take you deep into the workings of a dual-boot system, and by the end, you’ll be confident in tweaking your setup however you like.
From BIOS to UEFI
When the computer powers on, the BIOS (Basic Input/Output System, built into the motherboard) automatically checks core components (CPU, RAM, hard drives, etc.) and retrieves the boot priority configuration.
If no USB devices are connected and no BIOS settings are changed, it will boot directly from the hard drive.
How does it boot? The traditional BIOS reads the MBR (Master Boot Record) from the first sector of the hard drive, which contains the partition table and the bootloader. The bootloader then launches the operating system. However, modern system bootloaders might not fit here, so the MBR’s bootloader doesn’t directly start the OS but instead hands off to a secondary bootloader located elsewhere on the disk.
Now, the bootloader is running, and our system starts up, completing the boot process.
But wait! We have two hard drives! How does it know which one to boot from?
As mentioned earlier, the BIOS configures boot priority. Thus, multiple MBRs can exist on different drives, and the BIOS decides which one to use.
However, this boot method is now outdated, as it’s limited to 2 TB disks and has been largely replaced.
Its successor is UEFI.
Let’s revisit the earlier image.
What’s this EFI partition!?
You’ve probably noticed the EFI partition on our disks.
The EFI partition stores the bootloader required to start the operating system.
EFI partitions can be resized freely, overcoming the limitations of MBR (fixed size, must reside in the first sector).
Like BIOS, UEFI also allows configuring boot order. Each EFI partition is listed, and you can choose which one to boot from.
Bootloaders
Windows uses the Windows Boot Manager. Simple enough—it’s stored in the EFI partition on Disk 0 in the image above. Linux typically uses Grub, which can boot Linux systems. During installation, the installer automatically configures Grub’s settings, adding multiple boot entries.
Default boot entries include:
Ubuntu (boots Linux directly)
Windows Boot Manager (handles Windows booting)
You can freely choose between them during startup to load different systems.
Migrating Partitions
Now that we understand how the system boots, let’s start migrating partitions! Here, we’ll use Disk Genius PE edition to modify partitions.
Note: This demonstration uses a virtual machine since screenshots aren’t possible on a physical machine. Since it’s difficult and time-consuming to translate the images, just ignore the Chinese characters if you don’t know them. These images are just for reference, and you can do these operations with any software.
First, boot into the PE system and shrink the Windows partition to half its size.
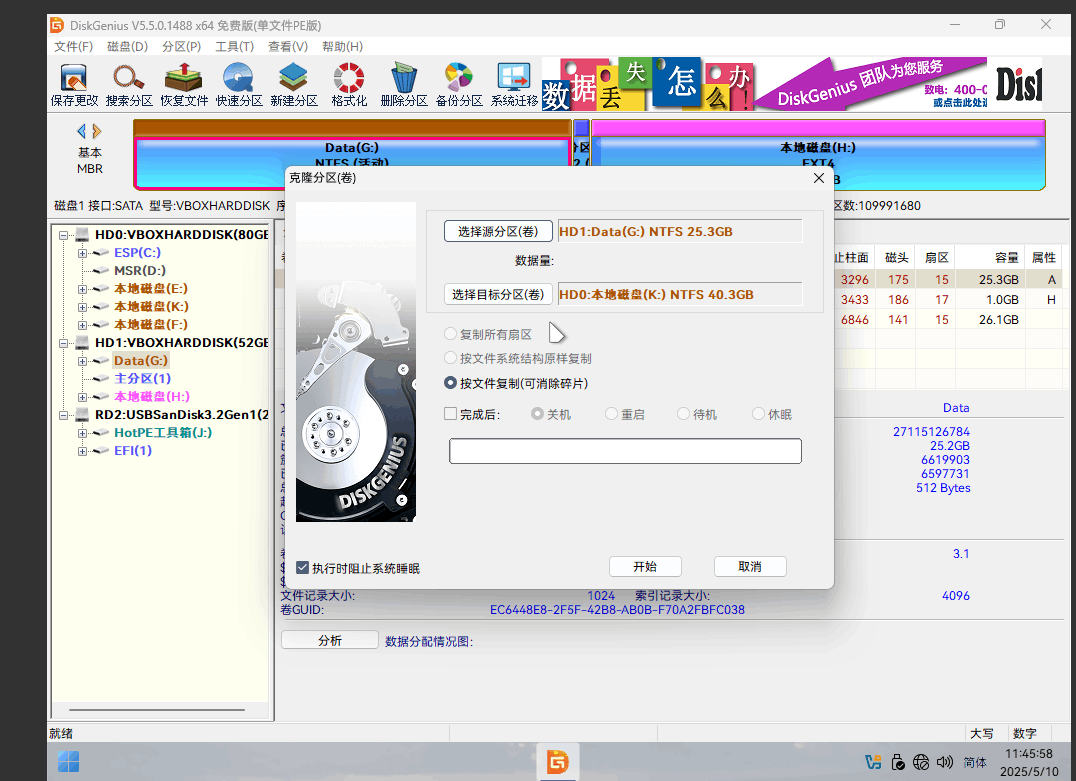
Then, copy the Data partition to the free space on Disk 0.
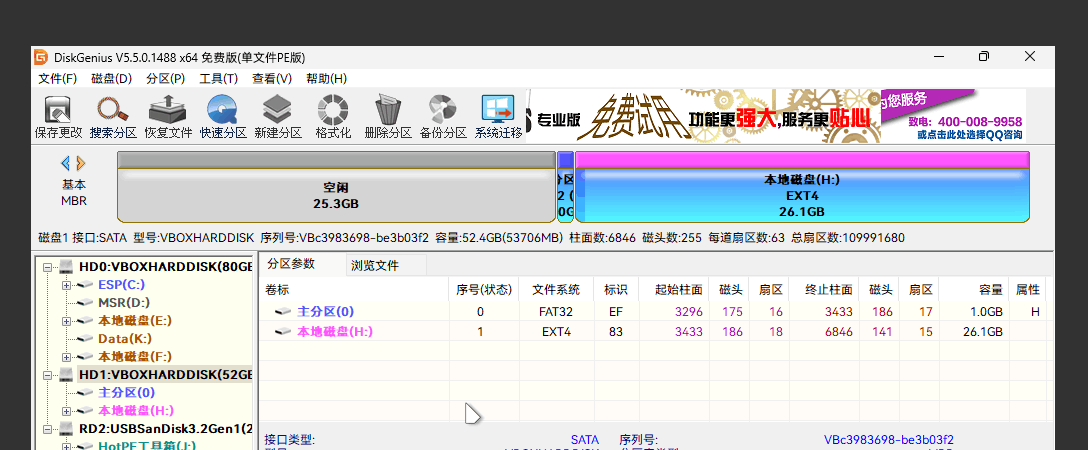
Next, delete the original Data partition.
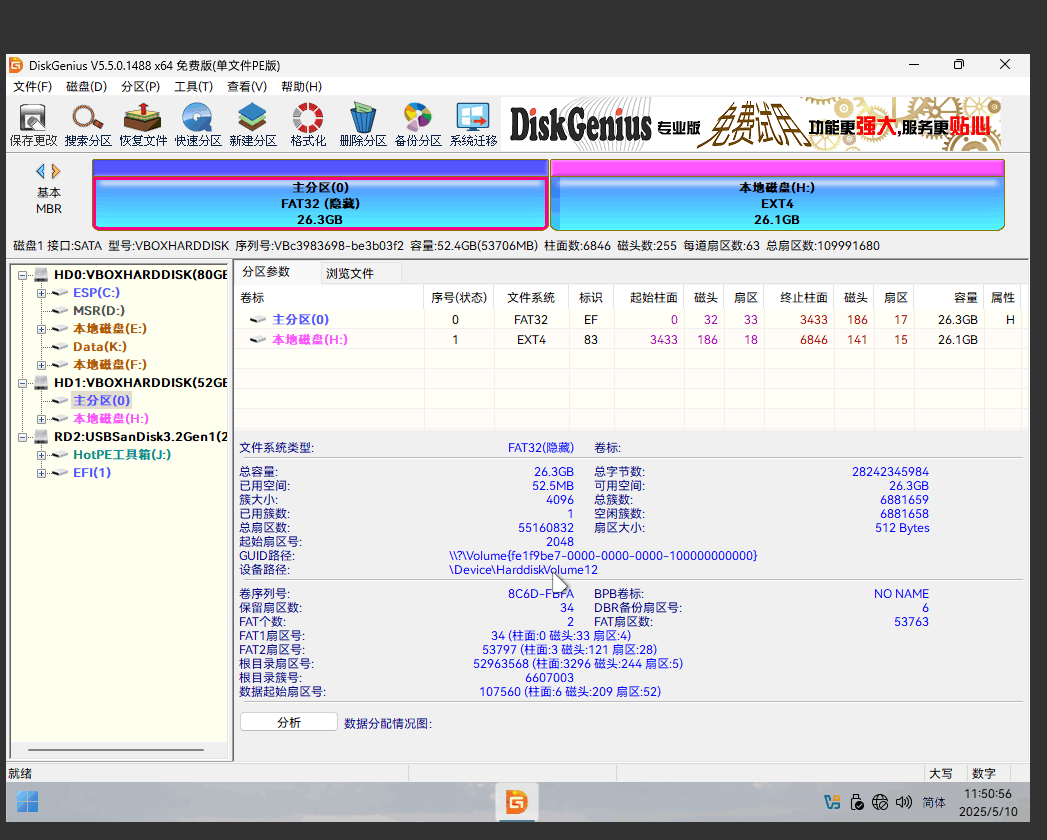
Now the disk looks like this.
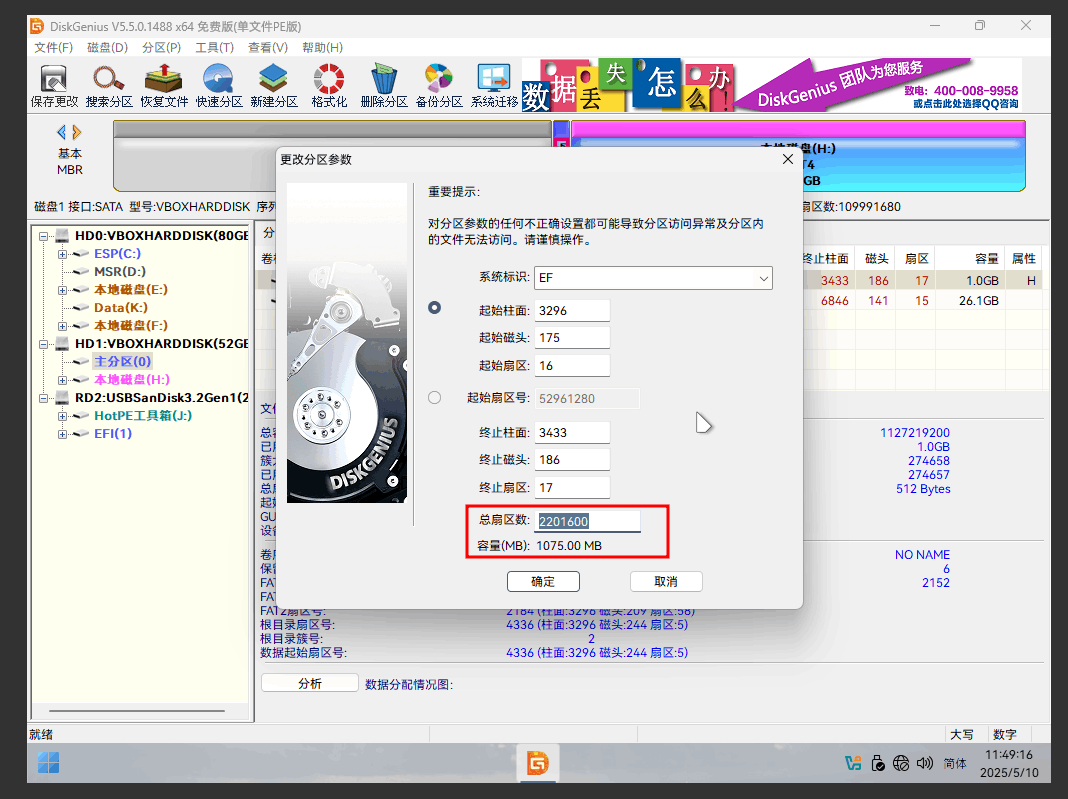
The EFI partition is sandwiched in the middle, preventing Ubuntu from utilizing the full space. To fix this, we’ll move it to the front of the disk.
First, record the total sector count:
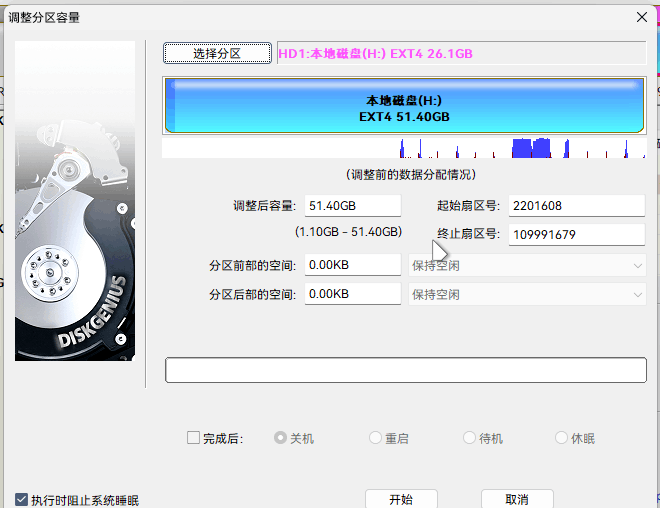
Then, expand the partition and shrink it back to its original size.
Finally, expand the Linux partition:
Now, boot the system.
You’ll notice that Grub’s configuration is still present, but due to the partition move, it can’t boot Ubuntu properly—it only reaches the kernel stage:
Booting the System via Command Line
Note: Windows isn’t shown here because this is a virtual machine demo.
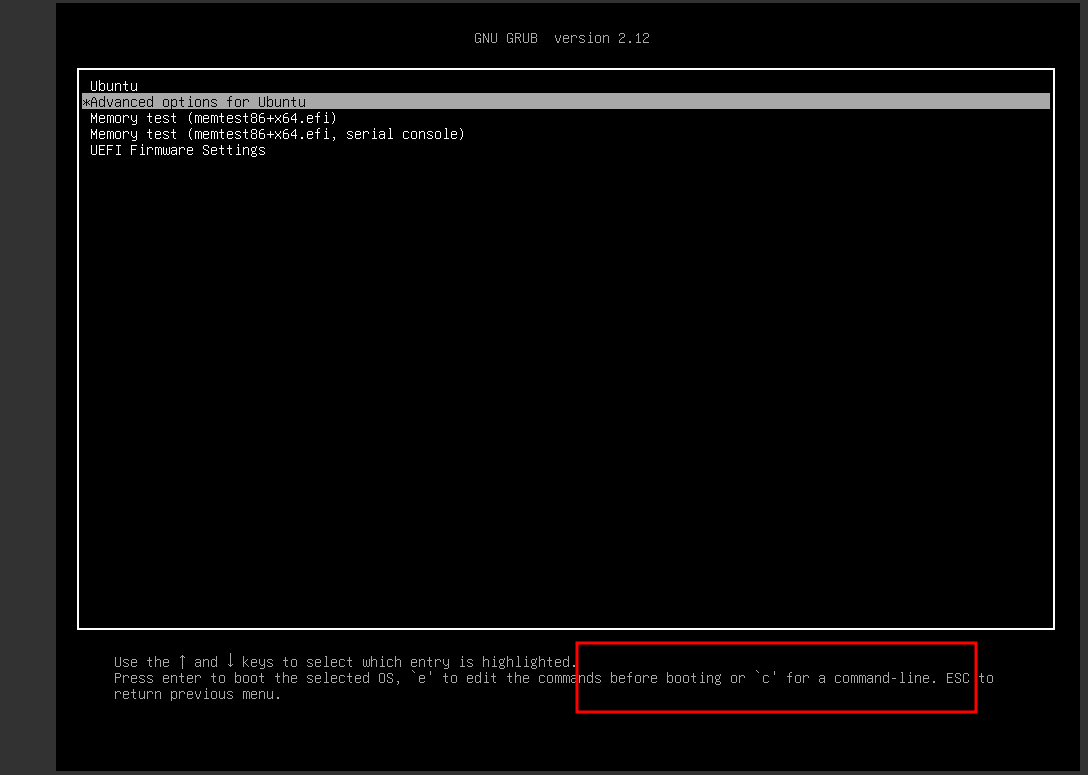
Press c to enter the command line. We’ll manually boot the system from here.
You should see a grub> prompt.
Enter boot, and it’ll prompt you to load the kernel first.
The kernel is located in /boot.
Enter linux (to specify the kernel), then the path, and press Tab for autocompletion:
Add ro to indicate the kernel should be read-only.
Then enter the boot command, but you’ll notice the system doesn’t start properly.
This is because the root directory isn’t specified.
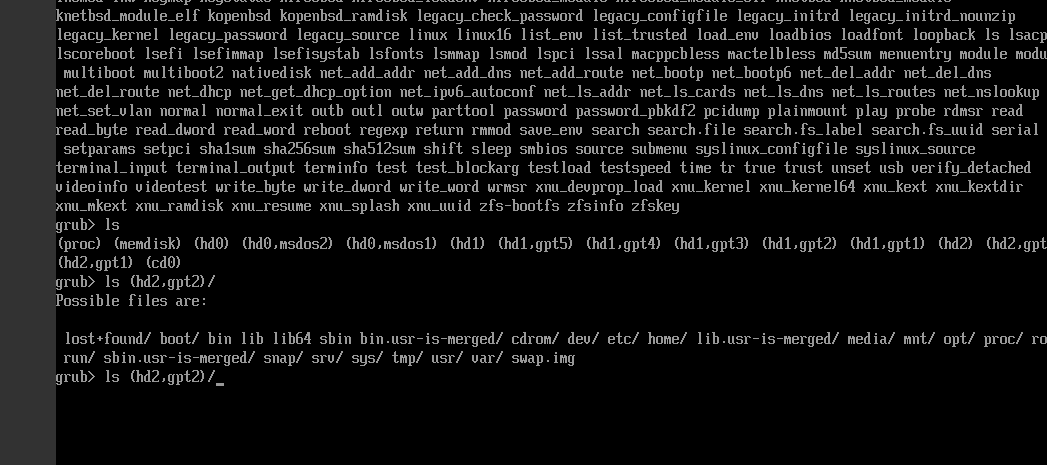
Press Ctrl+Alt+Delete to reboot, enter the command line again, and use ls to inspect disk partitions.
Use ls followed by partition identifiers to locate the Linux root directory:
Now we can boot the system via the command line.
Enter commands like the following:
linux /boot/vmlinuz-... ro text root=/dev/sda1
Your root parameter may differ depending on your disk and partitions. To find the correct identifier, run:
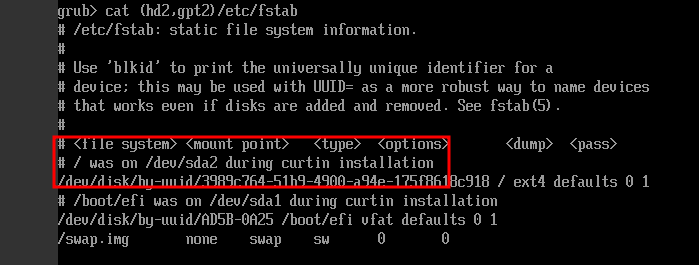
cat (hd2,gpt2)/etc/fstab
Replace (hd2,gpt2) with the Linux root partition you found earlier. The output should resemble this:
This reveals the partition used during installation. From here, you can deduce the correct partition. sda represents the disk used during installation, followed by the partition number. Try different numbers until you find the right one.
Then specify the initrd:
initrd /boot/initrd.img-...
Enter boot to start the system.
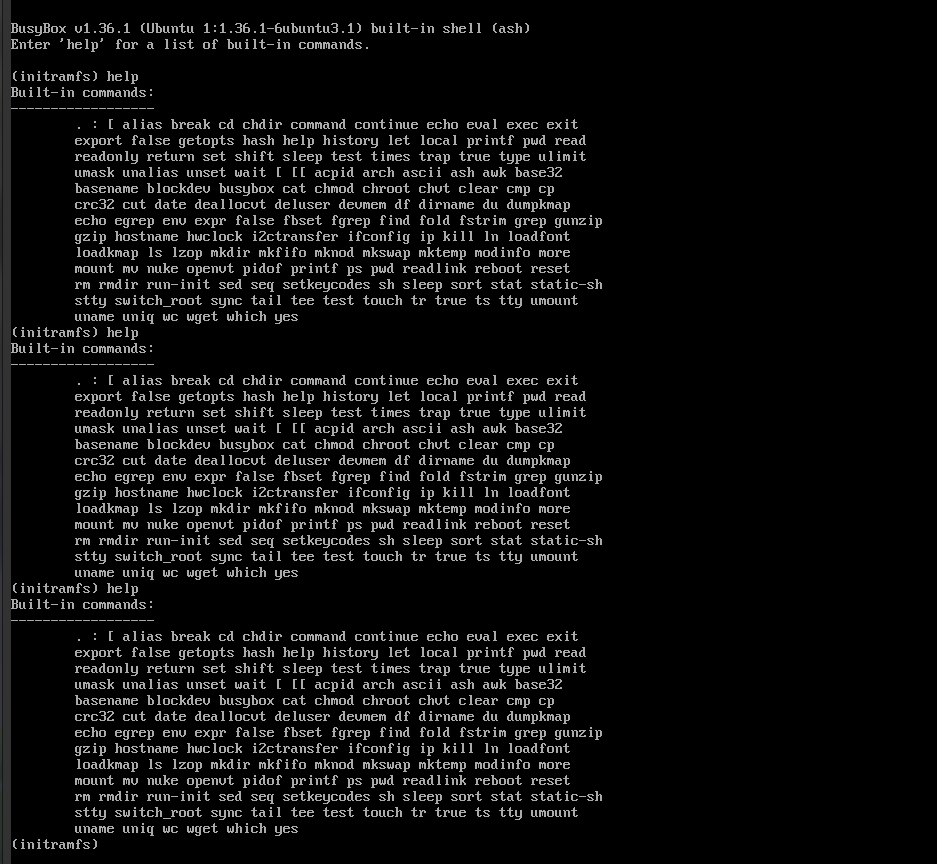
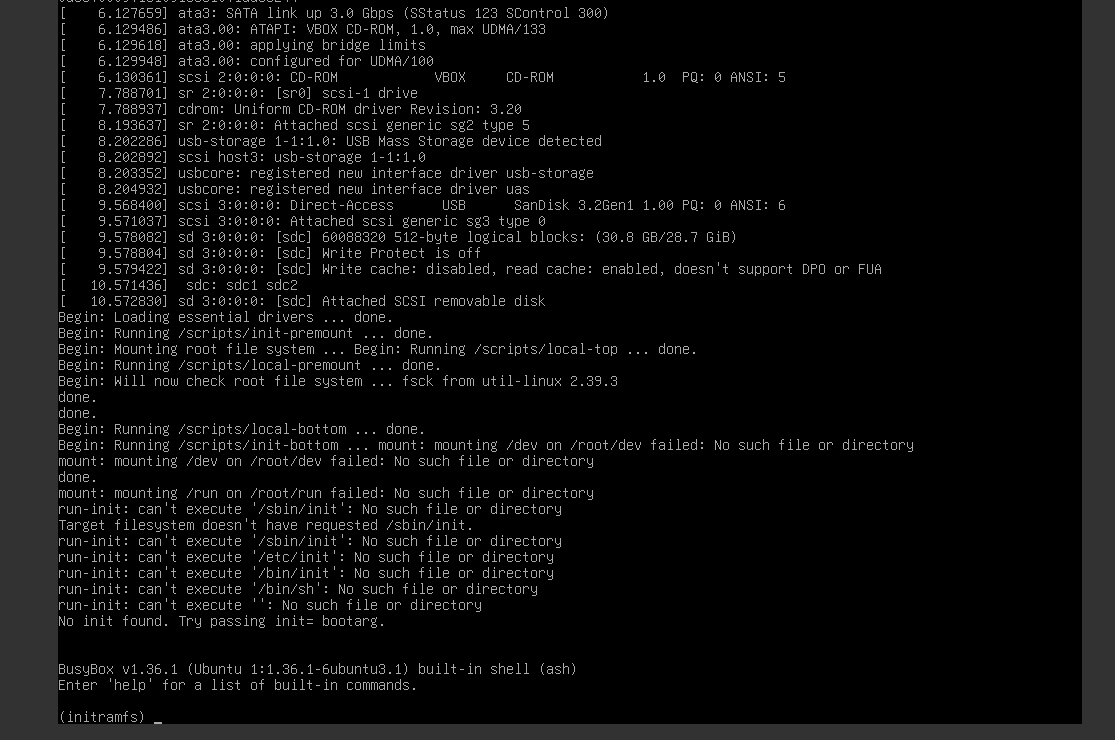
If you see the following, the root partition is incorrect—only the kernel boots. Restart and try another partition:
Otherwise, the system will boot successfully.
Reconfiguring Grub
To avoid entering commands every boot, use the update-grub command in the system to repair the configuration.
Run it directly. You’ll see it detects both Linux and Windows, completing the bootloader repair.


